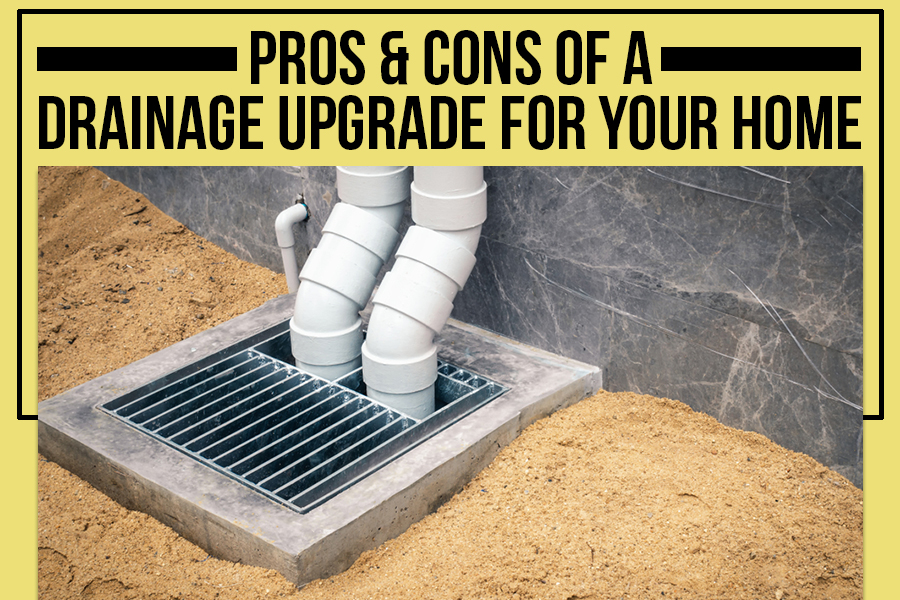
Pros & Cons Of A Drainage Upgrade For Your Home
Key Takeaways:
- Proper drainage is essential to divert water from the house, preventing foundation damage. Ensures water doesn’t seep into the foundation and cause harm.
- Consider installing d
- rainage systems to maintain a dry area to avoid pavement failure from inadequate soil conditions. Drains help
- prevent poor soil from undermining pavement integrity.
- Extending the lifespan of pavement is achievable through proper maintenance. Effective upkeep can add two to three years before repairs or replacements are necessary.
- Vigilance in inspecting completed projects is crucial for detecting cracks or structural changes early. Identifying fractures promptly allows for addressing the root causes and implementing appropriate remedies.
Water damage is a common and costly issue for homeowners, with an estimated 98% of basements experiencing water damage at some point, according to the American Society of Home Inspectors. One solution to this problem is a drainage upgrade, which can prevent water damage and improve the value of a property. However, this upgrade comes with its own set of pros and cons.
In this blog post, paving and masonry experts from Purcell’s Paving and Masonry will explore the benefits and drawbacks of a drainage upgrade for your home. By weighing these factors carefully, homeowners can decide whether a drainage upgrade is right for them.
Pros of a Drainage Upgrade
Prevents Water Damage to The House
One of the significant advantages of a drainage upgrade is that it prevents water damage. Proper drainage ensures that water is directed away from the house, preventing it from seeping into the foundation and causing damage.
Increases Property Value
A drainage upgrade can increase the value of a property. A well-maintained drainage system is an attractive feature for potential buyers. It indicates that the homeowner has protected their property from water damage.
Improves Curb Appeal
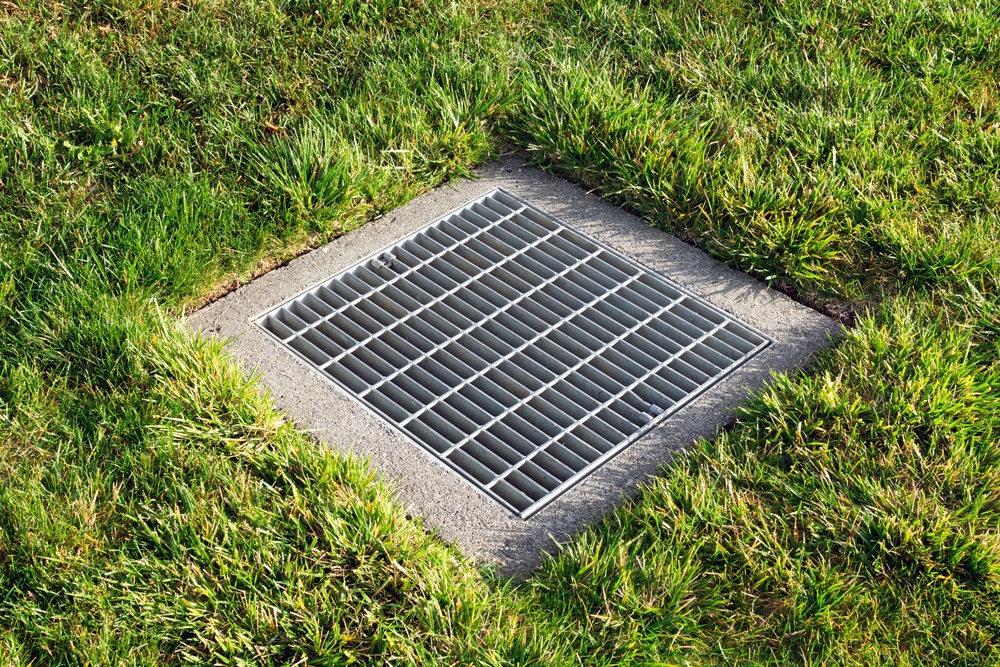
A properly functioning drainage system can improve the curb appeal of a property. Water pooling on the lawn or driveway is unsightly and can make a property appear unkempt. A drainage upgrade directs water away from these areas, creating a more aesthetically pleasing property.
Provides A Healthier Living Environment
Water damage can result in the growth of mildew and mold, which can be hazardous to human health. A drainage upgrade prevents water damage, ensuring the indoor environment remains healthy and safe for occupants.
Reduced Risk of Basement Flooding
Basement flooding is a common problem, especially in areas with high precipitation levels. A drainage upgrade can significantly reduce the risk of basement flooding by directing water away from the foundation and ensuring it doesn’t accumulate around the basement walls.
Enhanced Landscape
A drainage upgrade can enhance the landscape of a property. Proper drainage minimizes soil erosion, and water is distributed evenly across the lawn and garden beds, resulting in a lush and healthy landscape.
Also Read: What To Ask Your Masonry Contractor Before Hiring
Cons of Drainage Upgrade
While a drainage upgrade can provide significant benefits, there are also some drawbacks that homeowners should consider before investing. Below are some cons of a drainage upgrade:
High Upfront Cost
A drainage upgrade can be costly, particularly if extensive excavation or landscaping is required. Homeowners should budget for these costs and ensure they can afford the investment before upgrading.
May Require Excavation of The Yard
Depending on the existing drainage system and the severity of the drainage issues, a drainage upgrade may require yard excavation. It can be a time-consuming and disruptive process that may damage existing landscaping and hardscaping.
Maintenance Requirements
A drainage system requires regular maintenance to function correctly. It includes cleaning out debris, checking for clogs, and inspecting the system for damage. Homeowners should be prepared for these ongoing maintenance requirements and budget accordingly.
May Require Permits and Approvals
Permits and approvals may be required depending on the property’s location and the drainage upgrade’s scope. You should check with their local municipality to determine the necessary permits and factor this into your budget.
Could Result in Damage to Landscaping or Hardscaping
Excavation for a drainage upgrade can damage existing landscaping and hardscaping, including trees, shrubs, and patio pavers. Homeowners should be prepared for this possibility and budget for any necessary repairs.
Time-Consuming Process
A drainage upgrade can be time-consuming and may require several weeks to complete. Homeowners should be prepared for the disruption to their daily routines and factor in any necessary schedule adjustments.
Factors To Consider Before a Drainage Upgrade
Before proceeding with a drainage upgrade, homeowners should consider several factors to ensure the investment is worthwhile and appropriate for their property. Below are some of the critical factors to consider:
The Severity of Drainage Issues
The severity of drainage issues on the property should be assessed before proceeding with a drainage upgrade. If water damage or basement flooding is a significant problem, a drainage upgrade may be necessary. However, if drainage issues are minimal, other solutions, such as regrading or adding gutters, may be more appropriate.
Property Slope
The property’s slope is critical in determining the necessary drainage solutions. If the property has a steep slope, a French drain or catch basin may be required to direct water away from the foundation. In contrast, a flat property may require a surface drainage system.
Existing Drainage System
The existing drainage system should be evaluated to determine if it functions correctly. If the current system is inadequate, a drainage upgrade may be necessary. However, other solutions, such as cleaning or repair, may be appropriate if the existing system functions correctly.
Landscaping And Hardscaping
Landscaping and hardscaping should be considered when planning a drainage upgrade. The upgrade should not damage existing landscaping or hardscaping, and adjustments may need to be made to accommodate the new drainage system.
Budget
A drainage upgrade can be a significant investment, and homeowners should budget accordingly. The cost of the upgrade will depend on the severity of the drainage issues, the size of the property, and the type of drainage system required. Homeowners should factor in ongoing maintenance costs when budgeting for the upgrade.
Let Purcell’s Paving and Masonry Help!
If you’re considering a drainage upgrade for your Basking Ridge, NJ home, trust the masonry experts at Purcell’s Paving and Masonry to provide high-quality, reliable service. With years of experience in the industry, our team has the expertise and knowledge necessary to assess your property’s needs and recommend the best drainage solution for your home.
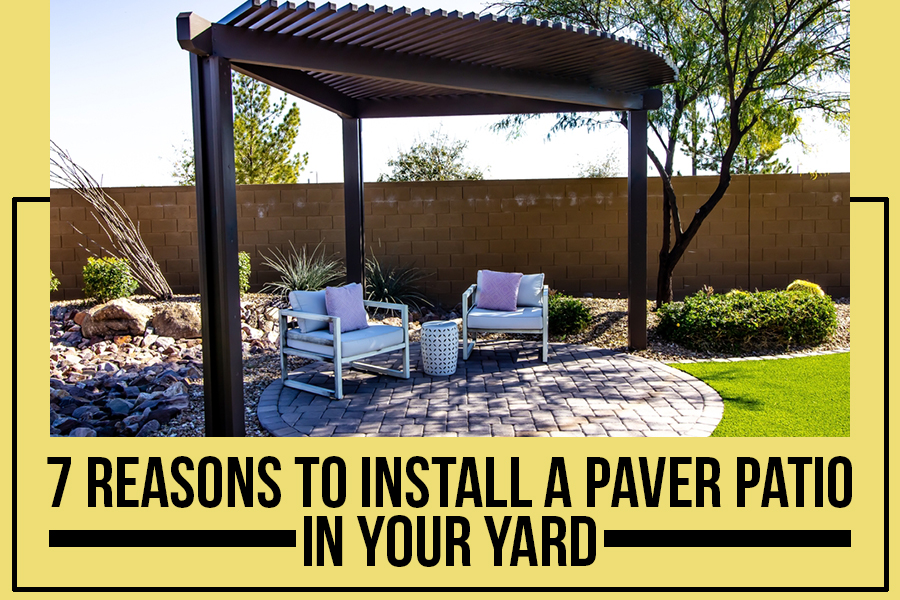
7 Reasons To Install A Paver Patio In Your Yard
Key Takeaways:
- Pavers are functional and beautiful outdoor flooring made of concrete, natural stone, clay brick, or even porcelain, available in various colors, shapes, and sizes.
- Outdoor living spaces like patios are one of the top features homebuyers look for when shopping for a new home, and a patio can increase the value of your home.
- They offer design flexibility, durability, stability, and versatility. They are cost-effective, making them an excellent choice for those on a budget.
- Pavers are eco-friendly as they require little energy to produce. Some pavers made of glass or ceramic can be recycled.
- Paver requires minimal maintenance, making them much easier to maintain in the long run than wood decks.
- Creative ideas for using these hardscape features include creating an outdoor kitchen, adding a fire pit, installing pergolas or arbors, creating a pathway, and adding seating areas.
- Using it with other hardscape features can improve your property’s outdoor appeal and create a unique and personalized outdoor oasis.
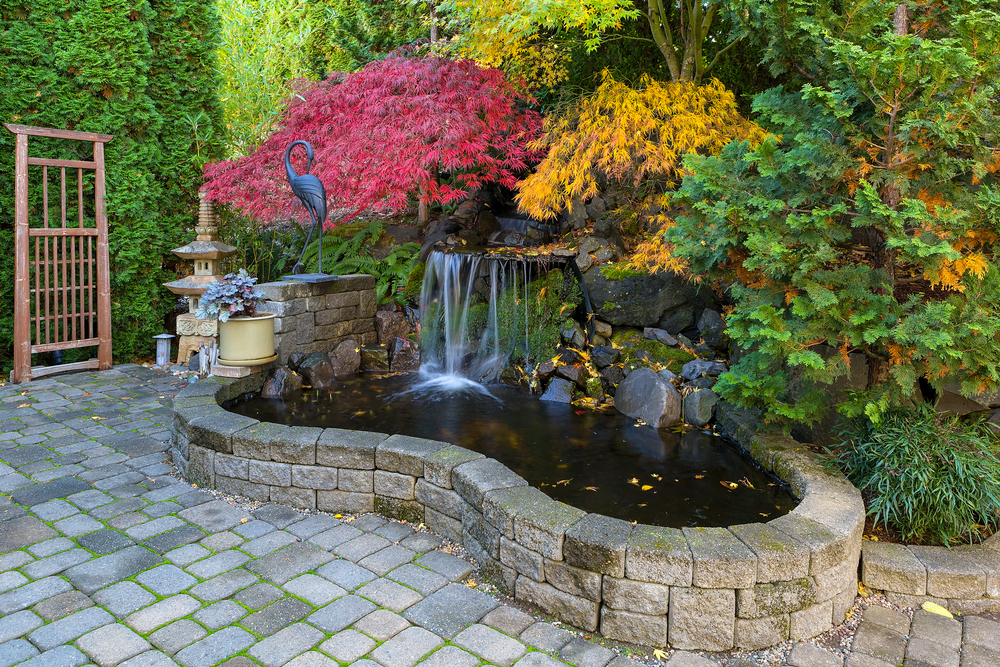
When transforming outdoor living space, paver patios stand out as a brilliant choice. These versatile and aesthetically pleasing features offer a multitude of benefits that extend beyond mere aesthetics. From their durability and low maintenance requirements to the vast array of design options, paver patios are a wise investment that enhances your property’s value, comfort, and style. Discover how this timeless and functional addition can elevate your outdoor experience and leave a lasting impression.
Purcell’s Paving and Masonry delves into seven compelling reasons to invest in this hardscape addition. We’ll also discuss some creative ideas to use pavers to improve your outdoor visual appeal.
Reasons to Install a Paver Patio in Your Backyard
First, examine why this hardscape feature is chosen over other outdoor hardscape options.
Design Flexibility
Pavers provide homeowners with various design options, from shapes and sizes to colors and textures. This hardscape feature can become an attractive focal point for your backyard or garden.
Durability
Pavers can withstand extreme weather conditions and last decades if cared for properly. Plus, they require minimal maintenance compared to wooden decks that need regular sanding, staining, and sealing every few years– which can be very costly! You can expect your patio to last up to 75 years with minimal maintenance in place.
Stability
The interlocking shape of this hardscape feature makes it one of the most stable hardscaping surfaces. The individual stones can shift and move with the ground, which helps prevent cracking and shifting from extreme weather like freeze-thaw cycles in winter months.
Versatility
Pavers come in a diverse range of shapes, sizes, and colors, enabling you to tailor your patio to match both your personal style and specific requirements. Whether you’re looking for a rustic look or something more contemporary– pavers have it all! In addition, with various patterns and styles, you can get creative by adding different designs and textures to your patio.
Cost-Effective
Installing pavers is one of the most cost-effective hardscaping options compared to natural stone or clay bricks. Pavers are inexpensive when stretched over an area, making them an excellent choice for those on a budget. The cost can vary depending on paver material quality and skills. A DIY project can cost up to $800, while hiring a professional hardscape installer can give a more satisfactory result but at a slightly higher cost.
Eco-Friendly
Pavers are an eco-friendly choice for outdoor surfaces. Their permeable design allows rainwater to naturally infiltrate the ground, reducing runoff and minimizing the risk of flooding.pavers exhibit remarkable durability and longevity, lessening the necessity for frequent replacements and the subsequent environmental repercussions. They are also made from natural materials, making them a sustainable option for eco-conscious projects.
Low Maintenance
After installation, they require minimal effort in terms of upkeep and maintenance. Weekly sweeping keeps your pavers looking great and prevents weed growth between them. You can even pressure wash them periodically to keep grime at bay if needed. Additionally, unlike wood decks, pavers do not rot or splinter over time, making them much easier to maintain in the long run.
5 Creative Ideas for Using Paver Patios
Create An Outdoor Kitchen
Adding an outdoor kitchen to your patio can easily elevate your backyard entertaining space. The possibilities are endless, from installing a countertop and grilling station to adding a sink with running water!
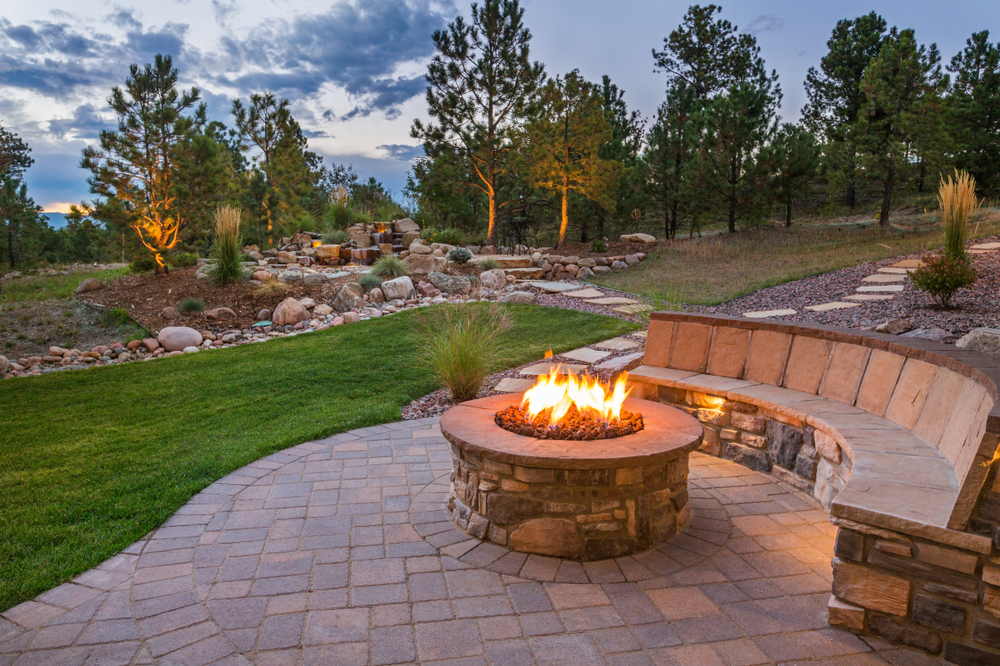
Add A Fire Pit
Enjoying time outside doesn’t have to be limited to summer months—build a fire pit and extend your outdoor fun into the colder seasons! It will add warmth and atmosphere to any social gathering.
Install Pergolas or Arbors
These structures provide comfortable shade where you can relax on hot days while enjoying the outdoors. Consider investing in a retractable canopy that can be opened and closed based on the weather.
Create A Pathway
This hardscape feature is perfect for creating pathways throughout your yard, from one garden area to another, or across the entire landscape. Lighting up these paths at night will add beauty and charm!
Add Seating Areas
Adding benches or other seating areas to your paver patio creates a cozy gathering spot where friends and family can relax and enjoy each other’s company while taking in the outdoors.
Related: Interlocking Paver Patios: A Concise Guide To Adding Style And Value To Your Home
Final Thoughts
There are many reasons for installing a paver patio in your yard. From increasing your home’s value to creating a unique outdoor living space, these patios offer endless possibilities for customizing and personalizing your outdoor oasis. In addition, by using them with other hardscape features, you can be sure that your patio will improve your property’s outdoor appeal.
Transform Your Backyard with the Help of Our Expert Hardscape Installers in Hillsborough, NJ
At Purcell’s Paving and Masonry, we’re your expert local hardscape installers in Hillsborough, NJ. Let us help you transform your backyard into an outdoor oasis with a stunning paver patio. From design to installation, we’ll handle every aspect of your project with care and precision. Contact us today for a free estimate and start planning your dream patio.
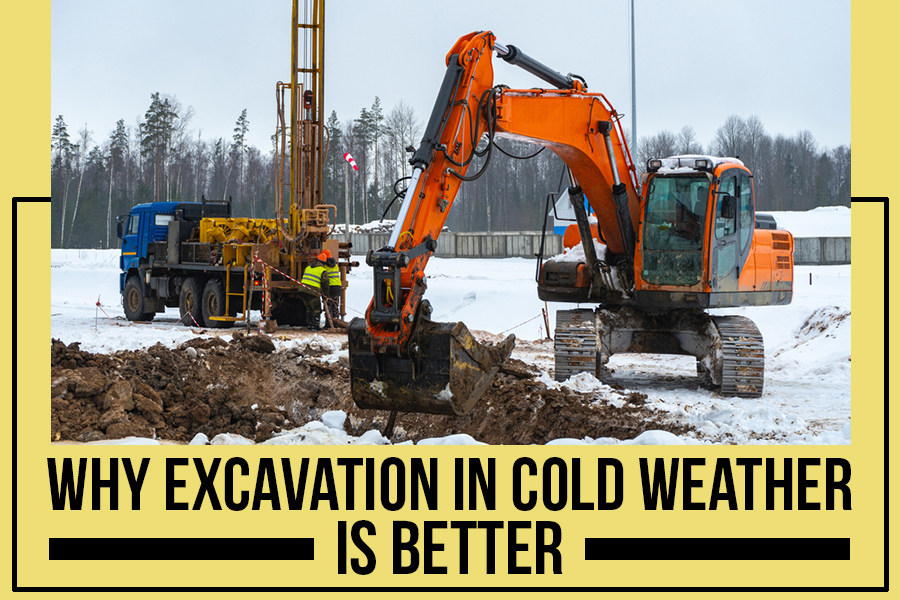
Why Excavation In Cold Weather Is Better?
Key Takeaways:
- Excavation is crucial for creating a stable and level base for construction projects.
- Winter provides unique advantages for excavation, including better stability, easier excavation, increased compaction, less groundwater seepage, and improved safety.
- To prepare for cold weather excavation, schedule the project accordingly, check the weather forecast, ensure equipment is maintained correctly, choose appropriate clothing and gear, have antifreeze and heaters at hand, and assess soil condition.
- Hiring an excavation specialist is a wise investment for any excavation project, as they have the necessary equipment, expertise, and knowledge of safety protocols and local regulations.
- Excavation is crucial for building structures, installing pools, and enhancing the aesthetics of your property.
- Proper safety precautions, like wearing layered clothing and reflective gear, must be taken when working in cold weather conditions.
- With the proper preparation and guidance, property owners can take full advantage of the benefits of excavating during cold weather, such as increased efficiency, stability, and safety.
Whether you’re planning to build a new structure, install a pool, or enhance the aesthetics of your property, excavation is a necessary step. Did you know winter can be the best time to tackle these projects?
According to a recent National Oceanic and Atmospheric Administration (NOAA) study, winter is expected to bring colder-than-average temperatures in many parts of the United States. It presents an excellent opportunity for excavation and grading projects.
Purcell’s Paving and Masonry will explore the advantages of winter excavation projects for commercial and residential properties. We’ll also provide tips for preparing for cold weather excavation, highlight the necessary equipment, and discuss the importance of partnering with an experienced excavator specialist team. So, let’s dive in and discover why excavation is best in cold weather.
Why are Excavation and Grading Crucial for Construction?
Excavation and grading are two essential parts of the construction process; they ensure a property is stable and level. Excavation involves digging trenches, underground tunnels, or other areas to create space for foundations, pipes, cables, and more. Grading gauges the slope of the land by moving soil around so that it is even and stable. Together, they create a safe base for construction to take place.
Benefits of Excavation and Grading During the Cold Weather
Although there is no limitation regarding excavation, the cold weather presents several benefits over other times of the year. Here are a few advantages that you can get from excavation during the fall and winter seasons:
Better Stability
The cold temperatures help keep the soil and excavated areas from shifting or collapsing, especially when compared to warmer weather. It makes it easier to plan trenches as they stay in place longer, allowing for better accuracy of calculations.
Easier Excavation
The cold weather is also beneficial when it comes to the actual excavation process. Soil becomes harder and drier in cold temperatures, allowing equipment to cut through them quicker and easier than in warmer temperatures. It makes the entire process more efficient and less strenuous on your machinery.
Increased Compaction
The colder temperatures also increase the compaction of the soil. It reduces the chance of settling or shifting later in the process, which would require additional time and effort to fix. It is beneficial during compacting soil for your property’s foundation and structural integrity.
Less Ground Water Seepage
The cold temperatures also help the ground to dry quicker and reduce the amount of water that seeps into the ground. It reduces drainage problems and prevents flooding during future weather events, saving you thousands of dollars.
Improved Safety
The cold months also provide a safer excavation and grading work environment. With less light and less extreme temperatures, safety is significantly increased. You can ensure safety while working in these conditions by taking the proper precautions with clothing and equipment.
How to Prepare for Cold Weather Excavation?
If you are planning to begin an excavation process during the cold months, here are a few of the most critical steps you should take:
Schedule the Project Accordingly
Unpredictable winter weather makes it essential to plan the project thoroughly and have a contingency in place should extreme conditions arise.
Check the Weather Forecast Before Starting
Check the weather forecast regularly to ensure you are not exposed to potentially dangerous conditions unsafe for excavation.
Ensure Equipment is Properly Maintained
The cold weather can be hard on equipment, so regular maintenance and storage items such as generators are essential for a successful job.
Choose Appropriate Clothing and Gear
Wear layered clothing to keep warm in colder climates. It is also essential to wear reflective gear like vests if working at night or with low visibility.
Have Antifreeze and Heaters at Hand
Antifreeze and heaters are essential for keeping your equipment safe and running in cold weather.
Assess Soil Condition
The soil might be more frozen and tightly packed in regions with cooler climates. It’s best to check its firmness before digging to accurately determine how difficult it’ll be to break through it.
Hire an Excavation Specialist
Hiring an excavation specialist when undertaking excavation and grading projects is always a safe bet. Not only will they have the right equipment for any job, but their expertise can help you get the job done faster and more efficiently. A good excavator should be knowledgeable about soil conditions, local regulations, and safety protocols. They can also help you plan and manage your project to ensure it is executed correctly, even during cold weather.
Related: Essentials To Prepare A Construction Site Like A Pro
Conclusion
Excavation is necessary for many construction projects. But these activities might be best done in the wintertime during cooler temperatures. By following proper safety protocols and investing in an experienced excavation specialist, you can take full advantage of the benefits of excavating during cold weather. With the appropriate preparation and guidance, you can quickly get through rugged terrain and have a successful construction project!
Excavation and Grading Services in Somerville, NJ – Contact Purcell’s Paving and Masonry
Looking for reliable and professional excavation services in Somerville, NJ? Look no further than Purcell’s Paving and Masonry! Our team of experienced contractors provides top-notch excavation and grading services to ensure your construction project succeeds. From site preparation to land clearing, we’ve got you covered. Contact us today for a free estimate while learning more about our services.
Key Takeaways
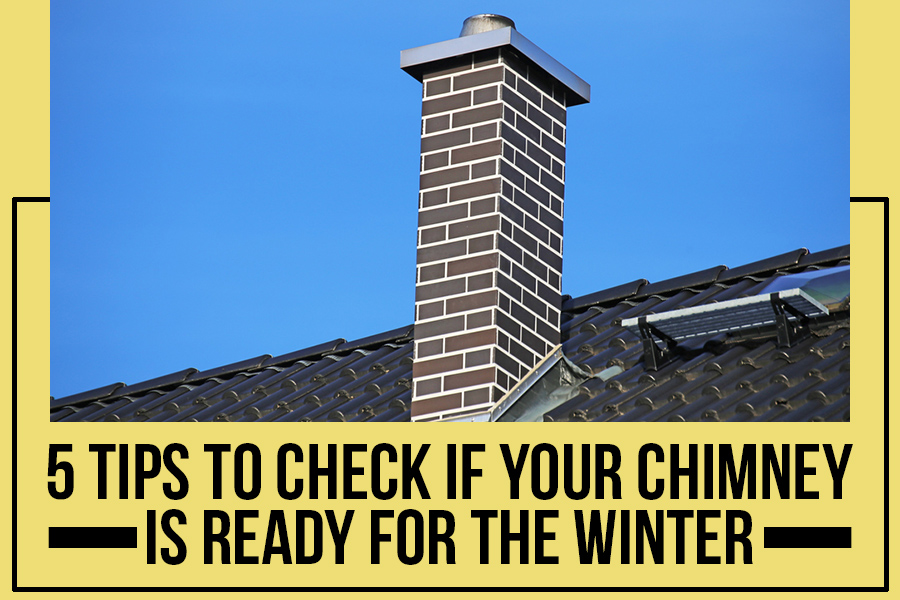
- Heating equipment, including fireplaces and chimneys, is the leading cause of U.S. house fires, so ensuring your chimney is in good working order before winter is crucial.
- Assessing your chimney condition before winter can help identify potential issues, such as visible damage, vegetation growth, and creosote buildup.
- Cleaning your chimney is essential to reduce the risk of chimney fires, keep air quality high, and increase energy efficiency.
- A dirty chimney can cause serious health risks due to the release of dangerous toxins, such as creosote and gases, into the air.
- Fixing common issues like blockages and leaks, damaged chimney caps, and cracked brickwork is essential to ensure your chimney is safe and efficient.
- Hire an experienced mason to inspect and repair your chimney to avoid any safety hazards and increase lifespan.
- Chimney maintenance before winter will keep your home warm and cozy and protect your family from any potential illnesses, allergens, and fire hazards.
As the temperature drops and winter approaches, nothing beats the warmth and comfort of a cozy fire in your fireplace. But before you start lighting those logs, ensuring your chimney is in good working order is essential.
Performing chimney maintenance and repair before winter is crucial for many reasons. According to the National Fire Protection Association (NFPA), heating equipment, including fireplaces and chimneys, is the leading cause of U.S. house fires. In fact, from 2016-2020, heating equipment caused an estimated average of 44,210 fires and 480 deaths per year.
Aside from safety concerns, a properly functioning chimney can also benefit you in other ways. For example, it can improve your home’s air quality, reduce energy costs, and prolong the chimney’s lifespan.
Purcell’s Paving and Masonry will discuss the essentials of chimney maintenance and repair before winter in this blog post.
Assess Your Chimney’s Condition
Assessing your chimney will help identify potential issues that must be addressed before the cold weather sets in. Here are a few steps to follow to determine your chimney condition before winter:
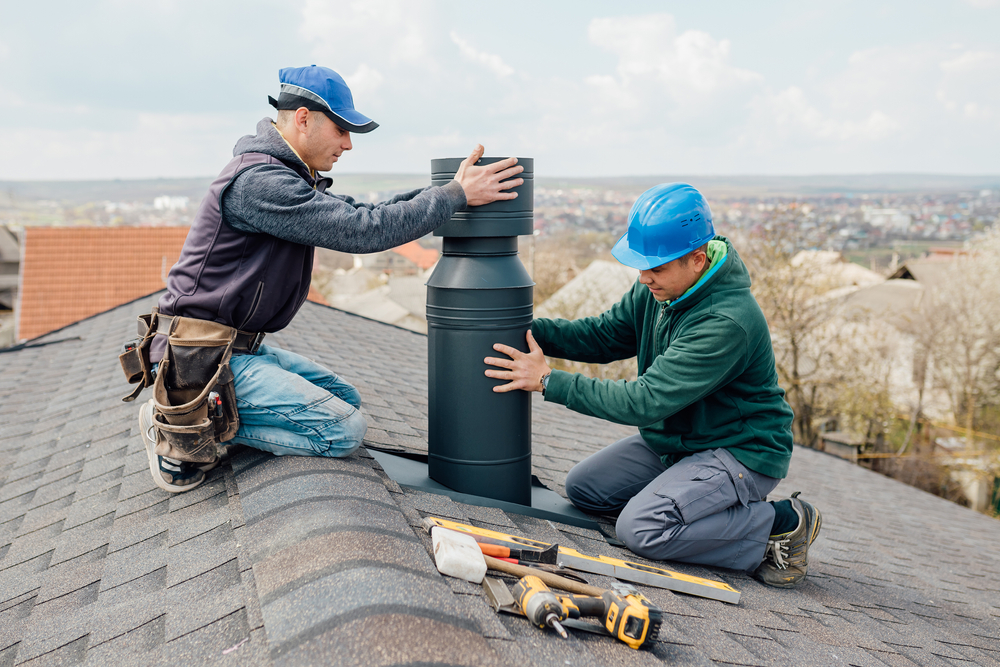
Inspect the Chimney Exterior
The harsh weather takes a heavy toll on the building’s exterior. It includes the chimneys as well. Rain and snow can cause cracking and other issues in the chimney. Carefully inspect the chimney for any visible damage, such as cracks, missing bricks, or loose mortar. Additionally, take note of any vegetation growing around it. It could be a sign of moisture issues.
Check the Chimney’s Cap
A chimney cap is essential to protect the inside of your home from animals, water, and debris. Damage can occur if the cap is not in place or has been displaced by animals. Additionally, make sure that there are no holes over the flue so that smoke can escape to the outside instead of entering your house.
Check the Flue
Another area that needs to be inspected is the flue. Ensure it has not shifted or become blocked with debris, such as bird nests, and check for signs of corrosion. Pay attention to dark patches on the walls, which could indicate a leak.
Look for Creosote Buildup
Creosote is a tar-like substance that builds up in the chimney and is produced by burning wood. It can be dangerous, as it is flammable, so check for significant buildup occasionally. In most cases, such buildup should be professionally cleaned by an experienced mason.
Check for Proper Drafting
You need to check for proper drafting to ensure your chimney functions correctly. It means checking for adequate air movement when the fire is burning. Various factors, including inadequate insulation and incorrect flue sizing, can cause poor drafting.
Clean Your Chimney
A dirty chimney can cause serious health risks due to the release of dangerous toxins such as creosote and gases into the air. A clean chimney is crucial for many reasons. Here are a few of the most important benefits of a clean chimney:
Reduces the Risk of Chimney Fires
Creosote is a by-product of burning wood, which builds up inside the chimney with each use. It can become highly flammable when it accumulates to a certain point, leading to a potentially dangerous chimney fire. Periodic chimney cleaning can ensure that the creosote levels do not become too high.
Keeps Air Quality High
The accumulation of creosote and other particles can be hazardous to your physical health and environment. Chimney cleaning ensures that your home’s air quality remains excellent, protecting you and your family from illnesses or allergens.
Increases Energy Efficiency
When your chimney is not properly cleaned and maintained, it can lead to heat loss through the chimney, resulting in decreased energy efficiency and increased energy bills. Frequent chimney cleaning prevents drafts and keeps warm air inside of your home where it belongs.
Repair Your Chimney
Making essential repairs is a critical part of chimney maintenance before the winter. Here are some common problems that may occur and how to fix them:
Blockages And Leaks
Blockages occur due to creosote buildup or animals nesting in the chimney. If you notice damp spots along the walls or smell smoke inside your house, it is a sign of blocked chimneys. To fix this issue, hire an experienced mason to remove the blockage.
Damaged Chimney Cap
A damaged or missing cap on top of the chimney could allow water flow and debris into the fireplace, damaging its structure and increasing fire hazards. Ensure your chimney has an intact cap before every winter, and replace it if needed.
Cracked Brickwork
Over time, brickwork may crack due to weathering and freezing temperatures. These cracks can lead to severe issues, such as water infiltration into the chimney. Hire an experienced mason to inspect your brickwork and repair any cracks or damages to fix this issue.
Related: Check Your Chimney Before Turning On Your Heat This Winter
Chimney maintenance before winter is a great way to ensure your fireplace remains safe and efficient throughout the cold months. Take the time to inspect, clean, repair, or replace any of its components as needed to keep your home warm and cozy.
Trust Purcell’s Paving and Masonry for Your Chimney Repair Needs in Warren, NJ
At Purcell’s Paving and Masonry, we understand the importance of a well-functioning chimney. We offer comprehensive masonry repair services, including chimney repairs, to keep it in good condition. Contact us today for a free estimate.
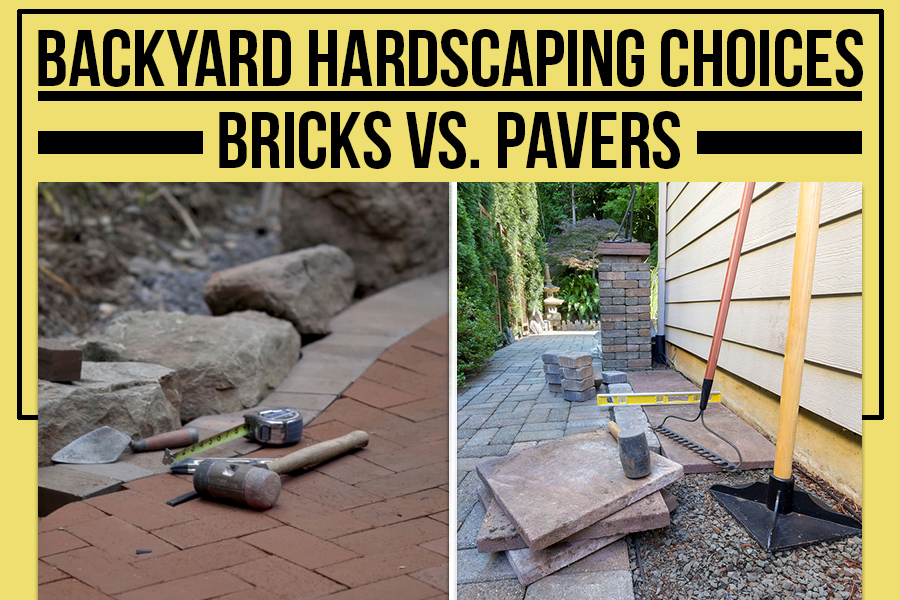
Backyard Hardscaping Choices – Bricks Vs. Pavers
Key Takeaways:
- Bricks are more durable but costlier, while pavers are cheaper but less durable.
- Consider climate, cost, aesthetics, and maintenance when choosing between bricks and pavers.
- Both require minimal maintenance.
- Hardscaping can increase property value.
- Proper installation is essential for longevity and durability.
- Hire professionals for best results.
Are you looking to transform your backyard into a beautiful and functional outdoor oasis? Hardscaping backyards with bricks and pavers might be the solution you need. Whether you want to create a relaxing space to entertain guests, a play area for your kids, or simply a place to unwind after a long day, hardscaping can help you achieve your goals.
But did you know that hardscaping can also increase property value? According to the National Association of Realtors report, investing in outdoor projects such as hardscaping maintenance can have a high return on investment, with homeowners recouping as much as 100% of the cost when selling their property.
That’s why, in this blog post, Purcell’s Paving and Masonry will explore the pros and cons of using bricks and pavers for hardscaping backyards and provide tips on choosing between the two materials based on your needs and preferences. We’ll also cover the installation process, maintenance requirements, and cost considerations so you can make an informed decision and create a beautiful and functional backyard. So, let’s move forward and learn what’s best for your property exterior.
What are Bricks and Pavers?
Bricks and pavers are two popular materials used in hardscaping. Bricks are made by baking clay at high temperatures, resulting in a strong material with a smooth texture that retains its color over time. Conversely, pavers are flat pieces of concrete or stone used to create even surfaces for patios, driveways, and sidewalks. They come in various shapes and sizes to accommodate any design style.
Pros and Cons of Using Bricks vs. Pavers for Hardscaping Backyard
When it comes to choosing between bricks and pavers for hardscaping your backyard, there are several factors to consider:
Durability
Bricks are durable, lasting up to 150 years without cracking or breaking. However, pavers tend to be less stable and can crack or damage due to exposure to the elements. They last from 25 to 75 years, depending on the maintenance.
Ease of Maintenance
Bricks require minimal maintenance; occasionally, sweeping away dirt and debris is usually enough to keep them looking new. Pavers, however, may need more regular cleaning and resealing to prevent stains from setting in.
Price Point
The cost of brick or paver hardscaping depends mainly on the specific material used; bricks typically come at a higher price point than pavers due to their durability, while pavers are often cheaper but less durable. You can expect to pay up to $10 per square foot, while concrete pavers will cost around $8 for the same area.
Design Flexibility
Bricks generally offer fewer design possibilities than pavers; they come in one size and shape, so creating complex patterns with them can take time and effort. However, pavers have a classic, timeless look popular in many traditional designs. Pavers offer more design flexibility; you can choose from various shapes, sizes, and colors for unique designs. From basketweave to Herringbone, several paver patterns exist for hardscaping backyards.
Factors to Consider When Choosing Between Bricks and Pavers
Now that you know more about bricks and pavers, how can you decide the best option for your hardscaping project? You should consider choosing the best material that works well with hardscaping.
Climate and Weather
Consider your area’s climate and weather when deciding between bricks and pavers. The climate and weather conditions in your area can affect the durability and longevity of your hardscaping. Consider a more durable option if your area experiences harsh weather and climate. If you live in a room with mild weather, either option can work.
Cost of Materials
When you’re planning a hardscaping project, the budget has to be taken into account. Bricks are usually costlier than pavers and require more manual labor for installation, increasing the costs further. Installing pavers is more straightforward and cheaper; however, they may not last as long under certain weather conditions as bricks. Plus, with some practice and guidance, one can even attempt it themselves! However, we recommend hiring paving and masonry services rather than DIY.
Aesthetics
Your preferences should be considered when choosing between bricks and pavers for your hardscaping project. Bricks come in various colors, textures, and sizes, so you can choose one that fits your design needs and aesthetic goals. On the other hand, pavers are available in an array of shapes, sizes, and colors. They can also be arranged into intricate patterns to add a unique flair to your backyard.
Maintenance
Looking after bricks and pavers may require different techniques, but both require minimal effort! Bricks need occasional sweeping and wiping with a wet cloth or mop. Pavers, however, require periodic weeding and may need to be sealed or re-sanded every few years. In both cases, it is essential to regularly inspect the surface for any damage or wear and tear that needs fixing.
Maintenance and Care in Hardscaping Backyard
For Bricks
Hardscaping backyards with bricks require effort to ensure they stay in tip-top shape. For most homeowners, maintenance is relatively easy.
- Sweep or mop any dirt off the surface regularly
- Wipe down bricks occasionally with a damp cloth or mop
- Periodically inspect for wear or damage and hire quality masonry services for repairs as soon as you notice them.
For Pavers
Pavers require more maintenance than bricks. In addition to regular sweeping and mopping, you need to:
- Seal pavers every few years to prevent staining, fading, and discoloration from the elements
- Re-level any shifting or sinking paver stones as soon as possible
- Weed often to ensure that plants do not start growing between the pavers
- Clean up algae or moss growth with a cleaning solution containing bleach and water.
Related: Interlocking Paver Patios: A Concise Guide To Adding Style And Value To Your Home
Final Thought
Ultimately, choosing between bricks and pavers comes down to personal preference. Consider the environment, maintenance needs, budget, style of your home, and lifestyle when deciding. Also, consult with paving and masonry service providers for professional advice. Considering all the factors, you can select the material that best suits your needs and create a beautiful hardscaping design to enhance your backyard!
Transform Your Backyard with Purcell’s Paving and Masonry Services in Branchburg, NJ
Ready to turn your backyard dreams into reality? At Purcell’s Paving and Masonry, we specialize in providing high-quality paving and masonry services that can enhance your outdoor living space’s visual aesthetic and functionality. Whether you want to install a new patio, walkway, or retaining wall, our experienced team can help bring your vision to life. Contact us today and receive a free estimate, and let’s get started!
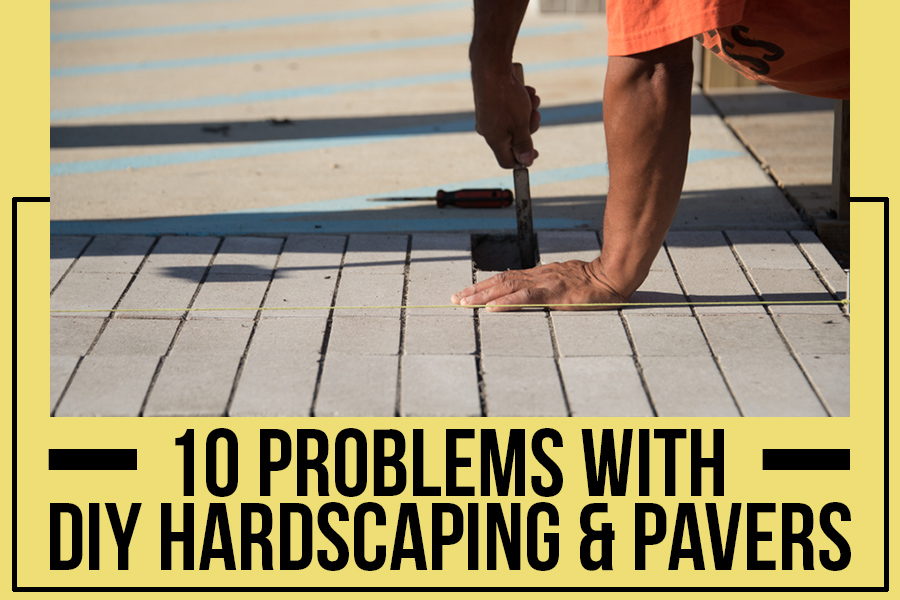
10 Problems With DIY Hardscaping & Pavers
Key Takeaways:
- DIY installations may seem appealing but have potential problems, such as lack of expertise, improper planning, and safety hazards.
- Professional installers offer valuable experience, specialized tools, and knowledge of local regulations, ensuring efficient and high-quality results.
- Hiring professionals provides access to warranties and guarantees, giving you peace of mind and protection against potential issues.
- Professional hardscape installations enhance the aesthetic appeal of your outdoor space and significantly increase your property’s value.
- Making an informed decision and weighing the pros and cons will help you create a beautiful outdoor oasis that stands the test of time.
Is your backyard an underutilized space, lacking the wow factor it deserves? Hardscape installation is one answer to improving your property’s exterior aesthetic. A well-designed outdoor space can significantly enhance property value, making it a hot commodity in the real estate market.
Did you know that hardscape and paver installation can boost it by 60% to 80%? No wonder many homeowners are drawn to the allure of DIY hardscaping projects. After all, who wouldn’t want to save some money while increasing the worth of their most significant investment?
However, before you grab your tools and embark on a do-it-yourself hardscaping adventure, it’s essential to recognize the potential problems and drawbacks that come along with it. While hardscape and paver installations can add value, they aren’t projects for anyone to tackle.
Purcell’s Paving and Masonry will explore the pitfalls of DIY hardscaping and pavers, shedding light on DIY enthusiasts’ challenges. From insufficient knowledge and planning to safety hazards and long-term maintenance issues, we’ll delve into why professional installers are often the wisest choice.
So, if you’re considering transforming your backyard into a beautiful outdoor haven, join us as we uncover ten problems with DIY. This information will help you avoid the potential pitfalls.
Problems with DIY Hardscaping and Pavers
DIY installations can entice homeowners seeking to add value and charm to their outdoor spaces. However, beneath the surface lies many potential challenges that DIYers may encounter, requiring careful consideration before embarking on such endeavors.
Lack Of Expertise and Knowledge
Hardscaping and paver installations demand a certain level of expertise that goes beyond simply following a tutorial. You may be in uncharted territory without a solid understanding of best practices, techniques, and potential pitfalls.
Inadequate Preparation and Planning
Rushing into a project without thorough planning can lead to costly mistakes. From failing to account for necessary permits to neglecting crucial groundwork, a lack of preparation can spell trouble.
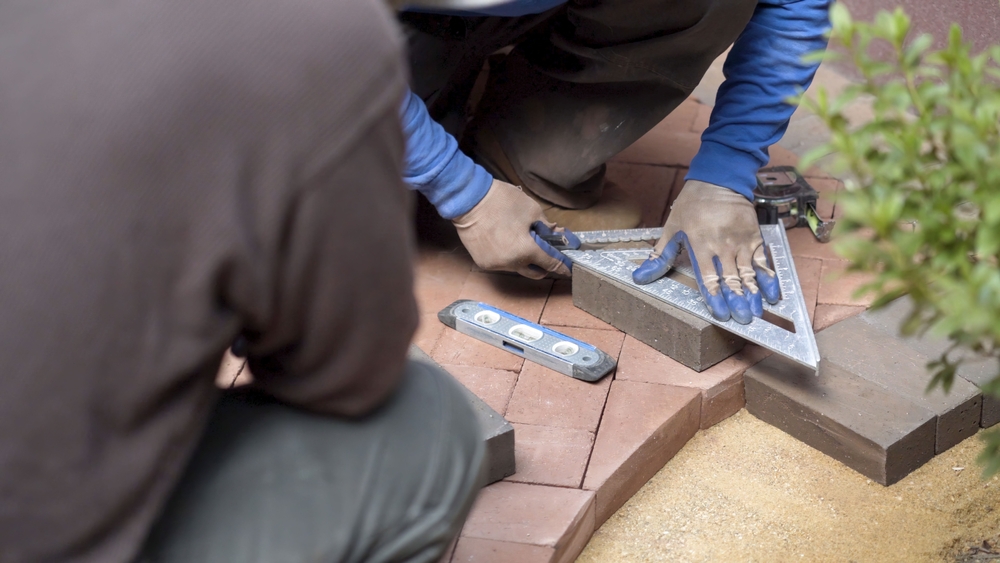
Incorrect Measurements and Leveling
Precision is key when it comes to hardscaping and pavers. Incorrect measurements and improper leveling can result in an uneven surface, compromising your outdoor space’s aesthetic appeal and functionality.
Improper Material Selection and Quality Control
Choosing the wrong materials or compromising on quality can have long-lasting repercussions. Subpar materials may deteriorate quickly, resulting in premature damage and the need for costly repairs.
Drainage Issues and Water Damage
Improperly designed drainage systems can lead to standing water, erosion, and potential water damage. Without proper planning and implementation, you may be battling constant flooding or struggling with stagnant pools.
The Time-Consuming and Labor-Intensive Process
Hardscaping and paver installations are not for the faint of heart. These projects demand significant time and physical labor. Be prepared for countless hours excavating, laying materials, and ensuring precise placement.
Safety Hazards and Personal Injury Risks
DIY hardscaping involves heavy lifting, sharp tools, and operating machinery. Without proper training and safety precautions, you may inadvertently put yourself and others at risk of accidents and injuries.
Limited Access to Specialized Tools and Equipment
Hardscaping projects often require specialized tools and equipment, which may not be readily available to DIYers. Renting or purchasing these items can quickly escalate project costs.
Lack Of Warranties and Professional Guarantees
Hiring professional installers often comes with warranties and guarantees, offering peace of mind. With a DIY approach, you assume full responsibility for any issues or defects that may arise, bearing the financial burden yourself.
Potential Long-Term Maintenance and Repair Problems
Inexperienced DIY installations may lead to future maintenance and repair challenges. From uneven settling to cracked pavers, you may face ongoing issues that could have been avoided with professional expertise.
The Importance of Professional Installers
While the allure of DIY projects may be strong, enlisting the services of skilled hardscape professionals can make all the difference in achieving your desired results. Here are the compelling benefits and advantages that come with hiring professional hardscape installers:
Experience and Expertise in Hardscape Design and Installation
Professional hardscape installers possess a wealth of knowledge and hands-on experience in their craft. They understand the intricacies of design, ensuring that your hardscape project is executed with precision and attention to detail.
Access To Specialized Tools, Equipment, and Materials
Hardscape installations often require specialized tools and equipment that may not be readily available to DIYers. Professional hardscape installers come equipped with the right tools and knowledge of cutting-edge techniques, ensuring efficient and high-quality results.
Knowledge of Local Building Codes and Regulations
Navigating the complex landscape of building codes can be daunting for homeowners. Professional installers are well-versed in these requirements, ensuring your project complies with all the guidelines.
Professional Warranties and Guarantees
You benefit from warranties and guarantees when you hire a reputable hardscape installer. These assurances provide peace of mind, knowing potential issues or defects will be addressed promptly and professionally.
Efficient and Timely Completion of the Project
Hardscape installations can be time-consuming and labor-intensive, especially for inexperienced individuals. By entrusting the project to professionals, you can expect efficient project management, streamlined workflows, and timely completion, allowing you to enjoy your revamped outdoor space sooner.
Related: The Hardy Scaper’s Guide To Hardscape Designing
Conclusion
While DIY hardscaping and paver installations may seem tempting, it’s crucial to recognize their potential pitfalls and challenges. By understanding the problems associated with DIY projects and acknowledging the advantages of professional installers, you can make informed decisions for your outdoor space. Trusting experienced experts ensures efficient, high-quality results, enhanced aesthetic appeal, and increased property value.
Transform Your Outdoor Space with Purcell’s Paving and Masonry
Ready to transform your outdoor space with professional hardscape and paver installations? Choose the expertise of Purcell’s Paving and Masonry, serving Bridgewater, NJ, and beyond. Get in touch with us for a free estimate.
Key Takeaways
- Corrugated pavement is visually unappealing and can be dangerous for driving.
- Weak subgrade, poor mixing, improper rolling, temperature changes, and soft bottom layers are common causes of corrugated asphalt pavement.
- Solutions to corrugated pavement include proper rolling and compaction, using modified binders, increasing asphalt thickness, and repaving the surface.
- Regular inspections, proper drainage, and prompt crack filling can prevent asphalt corrugation.
- Hiring a professional asphalt contractor can prevent corrugations by ensuring proper installation and repair.
Asphalt driveways and parking lots are essential to any property, providing a smooth and durable surface for vehicles to travel. In fact, according to a report by the National Asphalt Pavement Association, over 2.6 million miles of paved roads in the United States are surfaced with asphalt.
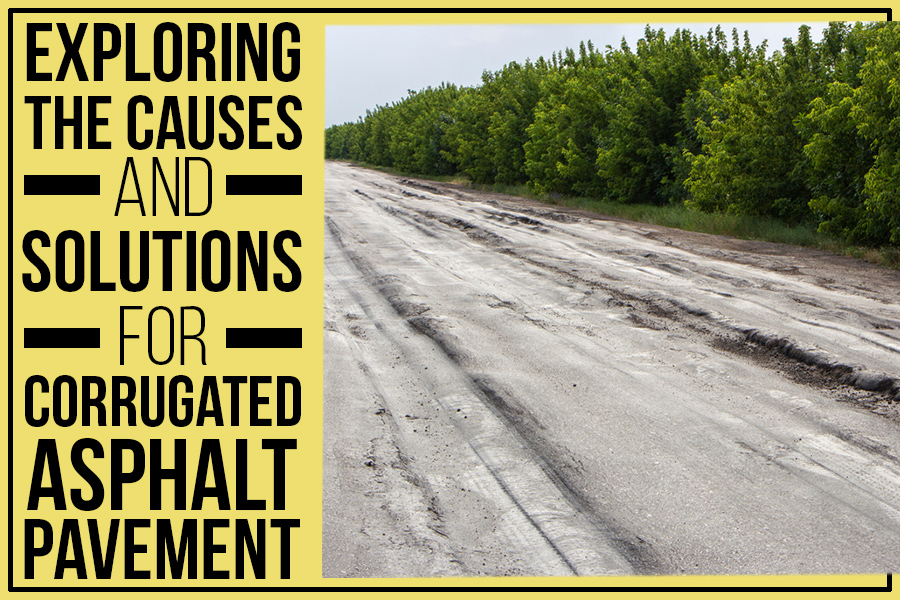
However, despite its durability, asphalt pavement can still suffer from various issues, including corrugation. Corrugated asphalt pavement is characterized by waves or ripples that can make driving uncomfortable and even dangerous. Purcell’s Paving and Masonry will explore the causes of corrugated pavement and provide tips and solutions for fixing and preventing this common problem.
What is Corrugated Asphalt?
Asphalt, although durable, isn’t perfect. Corrugated asphalt is a common issue that affects roads. It can be characterized by waves or ripples perpendicular to the traffic flow. Not only does it reduce the visual aesthetic of your property, but this defect can also make driveways and parking lots unsafe for driving.
Causes of Corrugated Asphalt
Corrugation can occur due to many reasons. Here are a few factors that lead to the pavement defect.
1. Weak Subgrade
Professional contractors create a parking lot and driveway pavement using four layers: namely, asphalt surface, base, aggregate, and subgrade layer (top to bottom). If the soil subgrade is of inferior quality, then flexible pavements will experience issues such as corrugation. Subgrades are considered weak when they contain highly plastic clays or abundant organic material. If there’s a high-water table near the surface layer, it further decreases its ability to bear loads.
To ensure the stability of the subgrade, weak soil is usually removed and replaced with larger stones and boulders. If this excavation does not reach a hard stratum, these stones can sink into the ground, which will cause ripples on the road’s surface.
2. Poor Mixing
Reusing asphalt as pavement material needs to be compacted with a mixture of new asphalt and aggregate. In some cases, the asphalt binder may not be evenly distributed, causing heavier spots that cause a ripple pattern when vehicles travel on it. It’s also possible that the underlying subgrade layer did not allow the compaction process to occur correctly.
3. Improper Rolling
Neglecting to compact the flexible pavement during construction properly can lead to numerous issues, including corrugations and shoving of the road surface. Without proper rolling, pavement layers may not adhere together in certain places, leading to disruption and the formation of waves on the surface when traffic passes over them.
4. Temperature Changes
Flexible pavement is affected by extreme temperature changes and can cause the asphalt to expand and contract. This expansion and contraction lead to minor cracks in the surface or even buckling of the layers underneath. When vehicles pass over these waves, it compounds the problem further, leading to ripples on the asphalt.
5. Weak Bottom Layers
Suppose the asphalt pavement layers are not adequately built up. In that case, they can become weak and unable to handle the traffic passing over them. It leads to buckling or rippling on the surface of the pavement.
Solutions for Corrugated Asphalt Pavement:
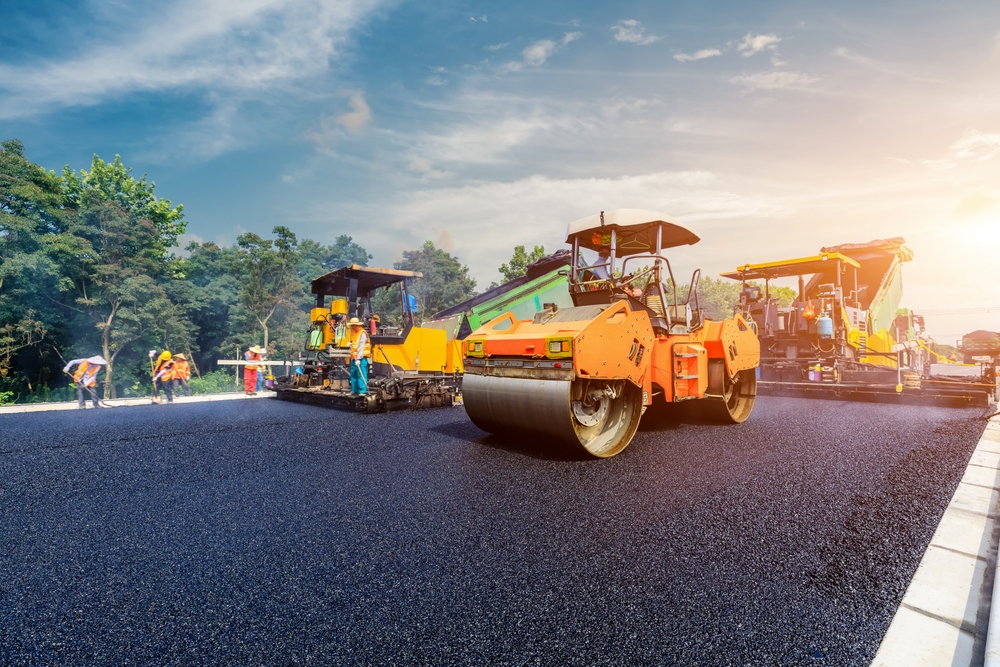
1. Proper Rolling and Compaction
Proper rolling and compaction are the most critical steps in constructing a newly paved road. Rolling helps to bind and compact all materials, making them less prone to shifting or cracking when exposed to temperature fluctuations.
2. Use Modified Binders
Using modified binders can help increase flexibility in asphalt pavement, allowing it to better expand and contract with temperature changes without developing corrugations. These modified binders can also be used to help prevent and reduce corrugation.
3. Increase Asphalt Thickness
Increasing the thickness of asphalt pavement can also help to combat corrugations. It increases its overall strength, making it less likely to buckle or ripple under load.
4. Repaving Asphalt Surface
Sometimes, the only solution to corrugated asphalt is to repave it. It can be costly and time-consuming, but the corrugations may worsen if repaving isn’t done.
Tips to Prevent Asphalt Corrugation
1. Regular Inspections
Regular inspections of asphalt pavement are essential to catch and address any issues before they get worse. If corrugation is spotted early on, it can be easily fixed with the abovementioned solutions.
2. Proper Drainage
Proper drainage is a must for maintaining sturdy asphalt pavement. Improper drainage can cause water to pool in certain areas, leading to further erosion and weakening of the pavement structure, increasing its susceptibility to developing corrugations.
3. Fill Cracks Quickly
Cracks in asphalt should always be filled as soon as possible if left unchecked. Over time, these can weaken and erode the pavement structure, making it more prone to developing corrugations.
Investing in Professional Asphalt Contractor
As corrugated asphalt occurs due to poor maintenance and installation, hiring a professional asphalt contractor is essential when the pavement needs to be installed or repaired. A good contractor will always ensure that all the necessary steps are taken to prevent corrugations from occurring. They have the experience and knowledge to recommend the best solutions depending on the underlying cause of the corrugations.
Related: 8 Critical Factors To Consider When Installing An Asphalt Driveway
Conclusion
Corrugated pavement can be a real problem for homeowners and businesses. Understanding what causes corrugations and the potential solutions for fixing them is essential. Investing in professional contractors can reduce the chances of corrugations occurring. Regular maintenance and inspections will help catch any problems quickly before they become too serious. With the proper knowledge, tips, and tricks, you can keep your pavement looking smooth and even for years!
Rely on a Professional Contractor To Keep Your Property Pavement Issue Free in Watchung, NJ
Regarding your property pavement in Watchung, NJ, Purcell’s Paving and Masonry has you covered. We provide commercial and residential paving services, including crack filling, seal coating, resurfacing, and repair. With us, you can rest assured knowing that any issues with your pavement will be handled promptly. Our team is knowledgeable and experienced in keeping your asphalt looking great for years. Get in touch with us to get a free estimate.
Key Takeaways:
- Regular inspections and maintenance are crucial for masonry structures.
- Identify and fix issues before hiring a masonry contractor.
- Hire an experienced, accredited contractor with good feedback, warranties, and insurance.
- Protect the surrounding area and use quality materials for durability.
- Obtain permits and establish a maintenance plan for success.
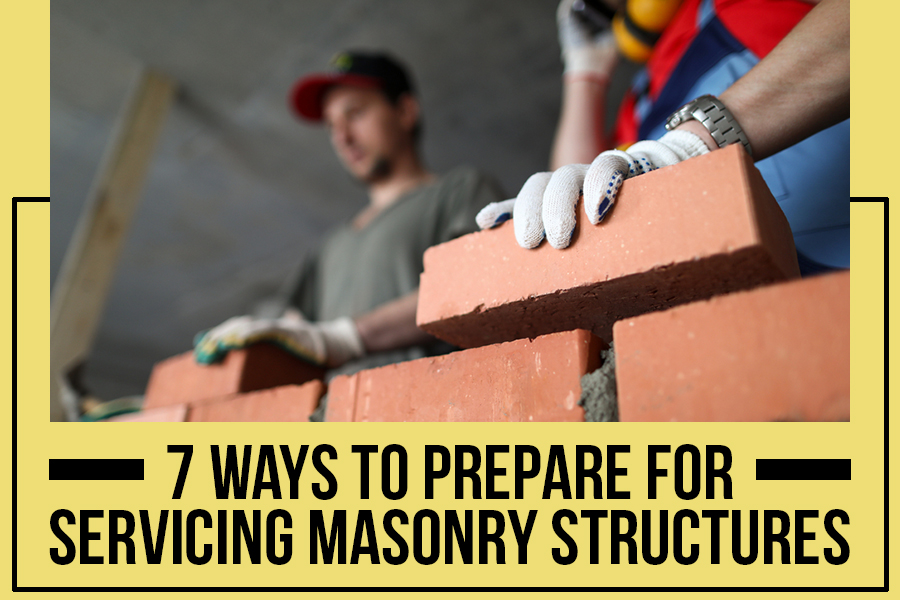
Throughout history, masonry has remained the most enduring construction method to provide practical and beautiful structures. As documented by historians, this technique dates back to Ancient Greece, Rome, and Egypt. A few examples of such structures include the Parthenon temple in Greece (5th century B.C.), the Colosseum in Rome (80 A.D.), and the Great Pyramids of Giza in Egypt (2560 BC). These buildings have withstood the test of time and remain an iconic symbol for learning about these ancient cultures.
Masonry is a perfect choice to bring out the beauty of modern buildings and homes. However, it’s important to remember that masonry structures require regular maintenance and repair for longevity and safety. Purcell’s Paving and Masonry will give property owners some expert tips on how to get ready for such tasks. We’ll explain why taking care of your masonry structure is critical and why relying on qualified contractors is essential.
Preparing for Masonry Structure Maintenance
1. Inspect the Building Regularly
It’s essential to check the masonry structure annually or as needed. Pay special attention to structural changes and look for signs of deterioration. In any case, regular inspections can help find issues early on and prevent significant damage.
2. Fix any Underlying Issue.
As you wait for a qualified masonry contractor for maintenance or repair, not only is it best to find the issue resulting in deterioration but also to find a way to fix it. For instance, if water leaks from the ceiling and damages your walls, you should contact a roof repair service before hiring a masonry specialist to deal with the issue. It will help extend the longevity of masonry structures.
3. Ask the Right Questions
When hunting for a brickwork professional, don’t settle for just any masonry maintenance provider. With over 95,000 masonry businesses in the U.S., locating the ideal fit can be daunting– but with some research and questioning, it’s achievable! Before signing a contract, ask about experience, customer feedback/references, warranties, and insurance. Doing so will ensure that your project is completed by an accredited contractor who stands behind its work.
Related: What To Ask Your Masonry Contractor Before Hiring
4. Keep the Area Protected and Safe
As you wait for the masonry structure maintenance team to arrive, it’s essential to safeguard any surrounding space or furniture. It includes protecting floors with a tarp and plastic sheeting, moving plants away from the working area, and removing all glass items or breakable objects. Doing so will minimize the risk of property damage during the project.
5. Establish a Maintenance Plan
Once the repair is complete, you’ll want to establish a maintenance plan for keeping your masonry structures in good condition. Rather than waiting until another problem occurs, create a routine inspection schedule that evaluates potential risks and takes precautionary steps to protect against them. With this proactive approach, you can ensure that your masonry structures last for years!
6. Obtain Necessary Permits
With any construction-related project, you may need to obtain necessary permits from local authorities. It can be a complex process and, if done incorrectly, can result in fines or delays in your project. Make sure to research the requirements for your area and take all steps needed to ensure that all paperwork and regulations are met before beginning maintenance on your masonry structures. Consult with a masonry specialist regarding what forms and regulations you must consider before starting masonry structure maintenance.
7. Invest in Quality Materials
Masonry structure maintenance is a long-term investment, so using quality materials for all repairs and installations is essential. Cheap materials may seem like the most cost-effective solution in the short term, but they will only last you for a short time and may require more frequent repairs or replacements. That will add to extra costs. Investing in quality materials upfront is always recommended for masonry structure maintenance.
Importance of Masonry Structure Maintenance
Masonry structure maintenance is an integral part of preserving masonry structures’ structural integrity and beauty. Due to wind, rain, and U.V. exposure, stone walls, chimneys, and other masonry structures are prone to weathering over time. Without regular maintenance, these structures can become damaged or unstable, which could lead to costly repairs or even replacements in the future. Regular cleaning, sealing, inspection, and repairs should be a priority when maintaining your masonry structure.

Why Hire a Qualified Masonry Contractor for Maintenance?
The best way to ensure that any masonry structure maintenance is done correctly is by hiring a qualified contractor with experience working with stone walls or other masonry materials. A professional masonry contractor can identify potential problems before they become severe and will have the knowledge to handle any complications that arise. A qualified masonry contractor can also advise you on maintaining your structure best and provide tips on preventing future damage. In addition, a masonry contractor can provide you with an estimate of the work that needs to be done and an itemized list of materials needed for the repair.
Conclusion
Masonry structure maintenance is essential to protecting the integrity and longevity of your stone walls, patio, or other masonry surfaces. Preparing for masonry structure maintenance can help you identify potential problems before they become more severe and provide guidance on what materials may be needed to repair the damage. Hiring a qualified masonry contractor will ensure that your repairs are done correctly and with the utmost care. With their experience, they can also provide tips and advice on maintaining your structure best and preventing future damage. Prepare properly when it comes time to service your masonry structures!
Get Qualified Masonry Specialists For Masonry Repair and Maintenance in Long Hill, NJ
You want to ensure you get the best possible masonry repair and maintenance service. Purcell’s Paving and Masonry in Long Hill, NJ, has an experienced team of masons who specialize in masonry construction and repair. We have the skills and knowledge needed for any masonry project, whether a minor repair or large-scale construction. Get in touch with us to receive a free estimate.
Key Takeaways:
- The 3-2-10 rule stipulates that a chimney must extend three feet above any roof penetration, be at least two feet higher than any structure within ten feet, and meet local building codes.
- Proper chimney maintenance is crucial to prevent expensive repairs or even the collapse of the chimney.
- Homeowners should have their chimneys inspected and cleaned regularly by certified chimney sweeps to prevent creosote buildup and chimney fires.
- Choosing suitable materials for the chimney can impact its safety, durability, and longevity.
- Proper support for a masonry chimney is essential to prevent collapse, which can cause significant damage, injury, or death.
- The National Fire Protection Association provides guidelines for chimney construction and maintenance that homeowners should be familiar with.
- Ignoring signs of chimney damage, such as cracks or loose bricks, can lead to more significant problems and costly repairs.
- Regular maintenance and timely repairs can prevent more significant damage, such as chimney collapse or house fires.
- Purcell’s Paving and Masonry is ideal for homeowners who need chimney repair services, thanks to their experience, reliability, quality materials, and affordability.
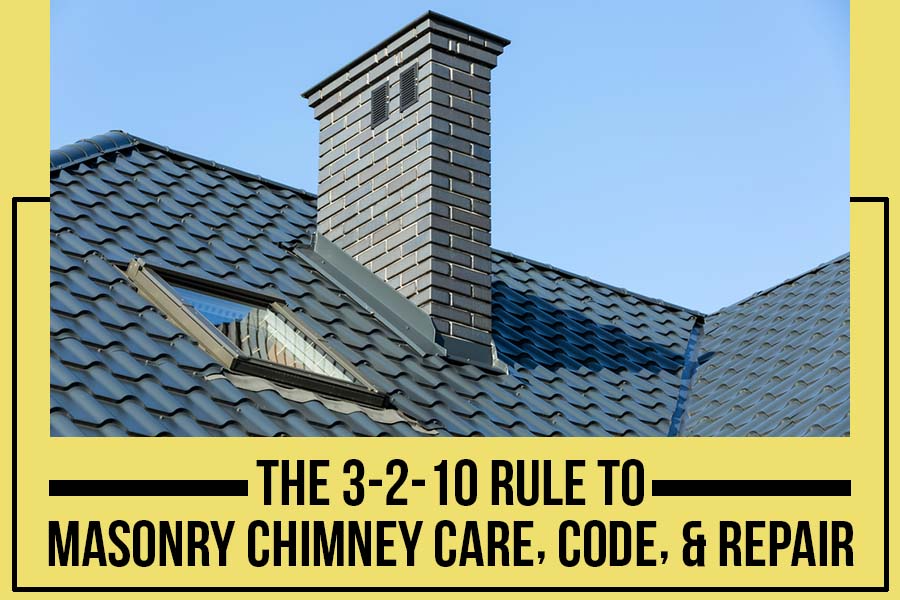
A masonry chimney is a crucial component of many homes used to vent fireplaces, wood stoves, and other heating appliances. As with any home system, it requires regular maintenance and care to function efficiently and safely. The 3-2-10 rule is a set of guidelines for homeowners and contractors to maintain their masonry chimneys. This blog post will discuss the 3-2-10 rule’s significance in masonry chimney care.
The 3-2-10 Rule
The 3-2-10 chimney care rule for masonry chimneys specifies that the shortest side should be at least 3 feet above the roof penetration. This is to ensure that the chimney is high enough to allow smoke and gases to escape safely without causing any damage to the roof or nearby combustible materials. The chimney’s top should be at least 2 feet higher than any part of the structure within 10 feet. This is to prevent downdrafts and to ensure that smoke and gases do not enter the building’s interior. Following the 3-2-10 rule can help prevent chimney-related accidents, including fires, carbon monoxide poisoning, and structural damage.
Regular Inspections are Necessary
It’s also essential to have regular inspections of your chimney. The Chimney Safety Institute of America (CSIA) recommends that homeowners have their chimneys inspected annually by a certified chimney sweep. During the inspection, the chimney sweep will examine the chimney’s interior and exterior for damage, such as cracks, corrosion, and creosote buildup. The sweep will also check the chimney’s flue liner, which is vital in containing and venting dangerous gases. If any damage or problems are found, the chimney sweep will recommend necessary repairs or maintenance to keep the chimney functioning safely and efficiently.
Properly Seal Your Chimney
One crucial aspect of maintaining a masonry chimney is ensuring that it is properly sealed and waterproofed. Water damage is a typical issue that can lead to structural damage, including cracks and deterioration. Water can enter the chimney through small cracks or gaps in the masonry, so it’s essential to have the chimney inspected and sealed regularly. A professional chimney sweep can apply a waterproofing sealant to the chimney’s exterior, protecting it from water damage and extending its lifespan.
Ensure Proper Ventilation
Another vital aspect of masonry chimney care is proper ventilation. Proper ventilation helps prevent the buildup of dangerous gases inside the home, such as carbon monoxide. Carbon monoxide is a colorless, odorless gas that can be lethal in high concentrations. A chimney sweep can inspect the chimney’s ventilation system and recommend necessary repairs or upgrades, such as installing a carbon monoxide detector or improving the ventilation airflow.
Regularly Maintain Your Chimney
Repairing a masonry chimney is often a complex and costly process. Therefore, regular maintenance and timely repairs are essential to prevent more significant issues and ensure proper chimney care. If you notice any signs of damage, such as cracks or loose bricks, it’s essential to address them immediately. Failure to address these issues can lead to more significant damage, such as chimney collapse or house fires. In some cases, chimney repairs may require the replacement of the entire chimney, which can be costly and time-consuming.
Buildup of Creosote
One common issue with masonry chimneys is the buildup of creosote. Creosote is a flammable substance inside the chimney due to incomplete combustion. Over time, creosote can ignite and cause chimney fires, leading to significant damage and even loss of life. To prevent creosote buildup, homeowners should burn only dry, seasoned wood and have their chimneys inspected and cleaned routinely by a certified chimney sweep.
Use the Best Materials
The materials used in building a masonry chimney play a significant role in its safety and longevity. Traditionally, masonry chimneys were constructed using brick and mortar, but modern chimneys can be built using other materials, such as concrete blocks or steel. Each material has advantages and disadvantages in terms of cost, durability, and safety. It’s essential to consult with a professional chimney contractor to determine which material is best suited for your needs and budget.
Ensure Proper Support
Another critical aspect of masonry chimney care is ensuring that it is properly supported. A poorly supported chimney can collapse, causing significant damage, injury, or death. The support system for a masonry chimney typically consists of a concrete footing and a metal chimney support bracket. The support system must withstand the weight of the chimney and the forces of wind and seismic activity.
Other Codes and Regulations
In addition to the 3-2-10 rule, some other codes and regulations govern masonry chimney construction and maintenance. The National Fire Protection Association (NFPA) provides guidelines for chimney design, construction, and maintenance. Homeowners should familiarize themselves with these codes and regulations to ensure their chimneys are up to code and safe to use.
Conclusion
Following the 3-2-10 chimney care rule and having regular chimney inspections by a certified chimney sweep are crucial steps in maintaining a masonry chimney. Proper sealing, waterproofing, and ventilation are also essential for masonry chimney care. By following these guidelines and having regular maintenance, homeowners can ensure that their chimney functions safely and efficiently for years to come. If you have any concerns about your chimney’s condition or need an inspection, contact a professional sweep today to schedule an appointment.
Related: What to ask your masonry contractor before hiring?
Purcell’s Paving and Masonry is ideal for homeowners in Short Hills, NJ, who require chimney repair services. With years of experience, we have established ourselves as a reliable and reputable contractor that provides high-quality services. We have skilled professionals well-versed in masonry chimney repair, maintenance, and construction. Our services are affordable, and we use only the highest quality materials to ensure that our clients receive the best value for their money.
Get a free estimate today!

Key Takeaways:
- Homeowners and business owners should invest in tuckpointing to protect their property from the elements.
- Tuckpointing is extracting deteriorated mortar between bricks, replacing it with matching or contrasting colored material, and adding putty down the center for an eye-catching effect.
- To understand more about this procedure, one must learn masonry terms such as pointing (filling mortar joints during new construction), repointing (refreshing existing joints), and tuckpointing (a complete repoint job that includes placing contrasting lines in each joint).
- DIYers can attempt this project; however, professionals are recommended for the best results due to precision requirements.
Do you gaze at the exterior of your home or business with pride and admiration? Or, do you cast an eye over it and wonder what hidden damage time, weathering, and wear have done to your hard work?
Invest in tuckpointing as a preventative maintenance solution to protect masonry exteriors from wind, rain, ice, and snow!
Let’s take a deeper look into this age-old practice that has helped preserve thousands of buildings for hundreds of years. With wisdom from master craftsmen, poetic descriptions of nature’s relentless toll on our structures, and a healthy dose of info, get ready for an exciting journey with Purcell’s Paving and Masonry, exploring how tuckpointing protects masonry exteriors from the elements!
What’s Tuckpointing?
Bricks provide long-lasting cladding when constructing interior and exterior walls, chimneys, and fireplaces. However, the mortar between them can erode even when the bricks remain in great condition. That’s where tuckpointing steps in to save the day!
Tuckpointing is the perfect way to breathe new life into masonry. The process involves extracting part of the worn-out mortar from between bricks, replacing it with a matching colored one, and then slathering on contrasting putty down the joint’s middle for an eye-catching effect.
Though tuckpointing goes well with all brickwork structures, it has become widely popular among proprietors wanting to restore their historical dwellings’ original slim joints look.
Does your brickwork need a facelift and protection from crumbling mortar? Read on to find out more about tuckpointing, as well as helpful guidelines for proper application.
Understanding Mortar Lingo
To become more acquainted with the tuckpointing process, it would be beneficial for you to learn these particular masonry terms:
1. Pointing
During new construction, the filling of mortar joints is called “pointing.” The term also describes the actual spaces between bricks in a finished wall.
2. Repointing
Revamping and refreshing mortar joints by extracting the existing mortar and injecting new material.
3. Tuckpointing
A complete repointing job involves chiseling out the worn mortar between the bricks and replacing it with a fresh new mortar that matches or contrasts in color with your bricks. To achieve an aesthetically pleasing result, narrow lines of putty—called ‘fillets’—are placed down the center of each newly laid joint.
Know The Difference!
While “tuckpointing” and “repointing” are often used interchangeably, they produce two different finished looks. Both procedures include replacing deteriorating mortar with fresh material; however, tuckpointing has an additional step of placing contrasting lines in the center of each joint to create a more decorative outcome.
Homeowners may elect tuckpointing for its visually appealing outcome. It is due to the mortar blending with the brick, which creates an indistinguishable look from a distance. The fillets give off the illusion of straight lines that appear as if constructed by new masonry — making your wall seem pristine and freshly built! Your guests will be left admiring this precise yet stunning craftsmanship.
Also, Read – Belgian Blocks – A Speedy History For The Eager Driveway Paver
The Process Of Tuckpointing
Whether you opt for a DIY approach or hire an expert, the following are the necessary steps to ensure successful tuckpointing.
Step 1
Dig out the existing mortar joints to a depth of roughly one inch. The most common approach is using an angle grinder. However, this task can create quite a mess and requires you to wear protective gear such as a respirator mask. On the other hand, if time isn’t an issue, then relying on more traditional methods like hammer and chisel could be beneficial too!
Step 2
Carefully sweep dust and particulate away from the mortar joints with a bristle brush or high-power air nozzle for optimal results.
Step 3
Mix the new mortar with a mortar pigment to get the same hue as your existing bricks. You may experiment for a bit before finding the perfect match. Once you do, record how much of each ingredient is needed so that future batches come out just like it!
Step 4
Before beginning the job, it’s important to observe a mason and learn their trade tricks so you don’t end up with mortar all over your bricks. When ready, start by filling joints horizontally before moving in other directions. Ensure you use new mortar for the best results!
Step 5
Once the wet mortar is applied to the joints, it should be flattened or shaped into a slight concave curve (depending on your aesthetic preference) for an even, polished finish.
Step 6
Now that the mortar has begun to harden, but is still workable, use a tuckpointing tool and straightedge for creating neat lines down the middle of each joint. Aim for precision in this step!
Step 7
To create distinctive fillets, accurately spread lime putty along the grooves and trim away any excess. A mason often uses a straightedge and sharp knife to achieve uniform lines in wider mortar joints easily. By following this process, you can ensure that your lines are even and aesthetically pleasing.
DIY?
Homeowners may think they can tackle tuckpointing on their own. Yet, it can be extremely difficult to get the precise accuracy required for beautiful and even-looking mortar lines. The slightest miscalculations in forming the fillets could result in an unappealing finished product — which is why we recommend entrusting this project to a professional who understands all that goes into perfecting the process.
The cost for professional tuckpointing ranges from around $9 to $15 per square foot, depending on your wall’s height and the prevailing mason rate in your vicinity. However, suppose you’re feeling adventurous enough to attempt DIY tuckpointing. In that case, the materials required (mortar and lime putty) will be a fraction of that price – less than one dollar per square foot – plus renting out the necessary tools can amount to about forty-five dollars a day!
When attempting to repoint or tuckpoint bricks, the task must be assigned to experienced professionals when replacing entire blocks – particularly for external load-bearing walls. Placing and resetting fresh bricks is more intricate than restoring a stable wall or chimney with point work. Therefore, it’s essential that you hire experts who know how to do this function properly.
Here’s How We Can Help!
Has the masonry of your home or workplace begun to show signs of wear and tear? Was it damaged after a recent storm, or are you merely looking for an upgrade with some expertly crafted masonry work? If so, look no further than Purcell’s Paving and Masonry! We’re here to help give your property in New Providence, NJ, that fresh new touch.
At our masonry firm, we are qualified to handle all projects – big or small. We boast years of experience in the industry and an expert team passionate about delivering unparalleled craftsmanship with each job. Whether foundation repair, stone carving, bricklaying, or tuckpointing, you can count on us for exceptional results! Our commitment to excellence also translates into developing new ways to enhance our services further. Get a free estimate.
Connect with us


Categories
From Excavation to Construction & Paving, We’re Your Friendly One-Stop Shop!
Providing a Full Range of Masonry and Paving Services in Bridgewater, New Jersey. Satisfaction Guaranteed!
Purcell's Paving and Masonry
-
778 Harding Road
Bridgewater, NJ 08807 - Mike (Owner) 908-906-0564
- purcellpavingmasonrynj@gmail.com
Our Services
Hours of Operation
| Monday | 7:00AM - 7:00PM |
| Tuesday | 7:00AM - 7:00PM |
| Wednesday | 7:00AM - 7:00PM |
| Thursday | 7:00AM - 7:00PM |
| Friday | 7:00AM - 7:00PM |
| Saturday | Closed |
| Sunday | Closed |
License#
Home improvement contractor 13VH09365200